
![]()
Guest post from Mitchell Parker, Houzz Contributor
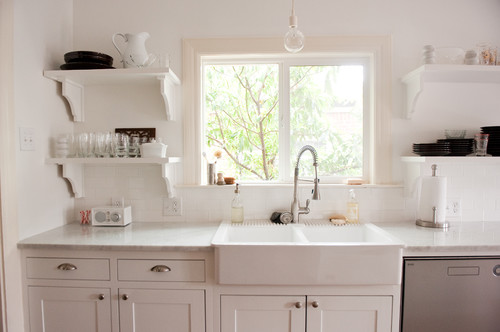
Your kitchen probably saw a lot of action during the holidays. How that splatter of mashed sweet potatoes got on the ceiling is anyone’s guess. But that mess just means it’s time for a deep cleaning. Here we round up a collection of cleaning guides that, if followed, will help you get your countertops, appliances, floors and more shining like new.
Appliances
A good portion of your deep-cleaning efforts should focus on the areas that see the most impact from spills, splatters and the like.
Refrigerator. Few appliances get out of hand as quickly as the fridge. Leftovers, forgotten food, leaky containers — before you know it, you’ll dread opening the refrigerator door to grab some coffee creamer in the morning.
How often: Many experts recommend a top-to-bottom cleaning every season but at least twice a year.
Begin by taking all the food out of the fridge and placing it in a cooler. Then remove the shelves and drawers and set them aside. Use a baking soda and water solution to wipe the inside thoroughly. Got stubborn, sticky spots? Try a nonabrasive scrubbing tool or put warm, wet paper towels on top to loosen the spot.
See more on cleaning your refrigerator
Dishwasher. The dishwasher, like the washing machine, is one of those appliances that many assume is self-cleaning. But that’s not the case. Lime scale, soap scum and food particles cause the machine to work inefficiently.
How often: Four to six weeks.
A clean dishwasher begins with hot water. So check to make sure your hot-water heater is operating at the optimal temperature of 120 degrees Fahrenheit (about 49 degrees Celsius). Next, empty the filter of food and debris, remove and clean the racks, and wipe the inside with a dry cloth or sponge. Avoid using hand soap or dish detergent, which can damage the machine’s components. Finally, use white vinegar or baking soda to remove hard-water stains.
See more on cleaning your dishwasher
Microwave. Food splatters are a fact of life when using this appliance. Even if you can live with seeing a mess every time you nuke your burrito, know that food particles can eventually make your machine run less efficiently. And nobody wants a cold burrito.
How often: Daily maintenance. Steam clean once a week.
Prevention is the name of the game here. Cover your food to minimize splatters, and wipe the inside of your microwave daily with a wet sponge or towel before food has a chance to harden.
For more stubborn spots, try heating about 1 cup of water in a microwave-safe container on high for two to three minutes. The steam should help loosen the caked-on spots. Next, use white vinegar to wipe out the inside. Also, make vacuuming your microwave’s vents part of your vacuuming routine.
See more on cleaning your microwave

Range and oven. This appliance probably took the brunt of your holiday cooking messes. It’s not the easiest or quickest thing to clean, but as the star of your kitchen, it’s necessary.
How often: As needed.
Remove the burners and trays and soak them in soapy water for 20 minutes, then scrub clean with a sponge. Wipe down the stove-top.
For the oven, remove the racks and soak them in sudsy water in your sink, then wipe clean with a sponge. Look to your owner’s manual for the right cleaning method for the oven, but you can begin by vacuuming out the crumbs on the bottom and wiping the inside with a damp sponge. A commercial oven cleaner will be your best bet but there are alternative solutions as well.
As a daily preventative measure, try putting parchment paper on the bottom to catch drips and spills and change out as needed.
See more on cleaning your range and oven

Stainless steel. Stainless steel appliances continue to be the norm in most kitchens. While its name implies a certain built-in cleanliness, steel surfaces, including countertops, are still prone to rust and stains.
How often: Daily.
Use soft sponges and microfiber cloths to wipe steel surfaces. Avoid steel scouring pads, which can scratch surfaces. For tough spots, use plastic scrubbing pads.
For brushed or polished steel surfaces, always wipe and scrub with the grain direction. Use CLR for any hard-water stains, and diluted vinegar, baking soda, alcoholic solvents and chloride-free glass sprays elsewhere.
See more on cleaning stainless steel

Countertops
Spots and stains on countertops are probably the most visible and pressing messes in your kitchen. Each material is different, so do some research before you break out the abrasive cleansers, which could damage your countertop beyond repair.
Marble. Few materials offer the subtle beauty of marble. But it comes with a price, both in terms of cost and maintenance. Etching from lemon juice, alcohol or tomato sauce can wreak havoc on your precious marble surfaces.
How often: Daily. Seal once a month.
First, avoid acidic substances coming into contact with your countertop. That includes cleaning products but also vinegar, lemon juice and bleach.
To clean, just use mild soap, water and a nonabrasive sponge. At least once a month, experts recommend applying a spray sealer to help reduce stains and etching.
See more on cleaning marble surfaces
Granite. Still the most popular countertop material, granite is relatively easy to keep clean.
How often: Daily. Seal every year or two.
You can get by with using a soft cloth and warm water, or cleansers made specifically for granite. Every year or two, seal your slab with an impregnating water-based sealer made for granite.
You’ll still want to avoid acidic cleaners and citrus when possible. And don’t use steel wool, which can scratch most countertops. Plus, never place a hot pot or pan on a countertop surface. Always use a trivet for protection.
See more on granite countertops
Butcher block and cutting board. Even if you don’t have full butcher block countertops, chances are you’ve got a hefty cutting board that needs cleaning.
How often: After each use. Oil as needed.
Unlike, say, laminate surfaces that take awhile for stains to penetrate, wood surfaces require fast acting.
After you’re done cutting or chopping, remove all food waste and scrub the surface with mild soap, then dry it. To disinfect, avoid chemical cleaners whose residues can taint food. Instead, use undiluted vinegar.
For tough stains, try lemon with table salt, or baking soda. Over time, your wood may need an oil boost. Spread it evenly, let sit for 15 minutes, then wipe off any excess with a clean towel.
See more on cleaning butcher block
Pantry
It’s hard to feel like you’re operating in a clean kitchen when you know a huge, disorganized mess lurks behind your cabinet doors.
How often: As needed.
Begin by taking everything out and sorting by what you want to keep and what you want to donate. Then wipe down all the shelves and walls to remove stains and any food crumbs. This is a good time to assess what you can do to improve storage and organization.
See more on cleaning and organizing your pantry
Walls
Walls see a fair share of abuse from splatters, scuffs and dings.
How often: Every few weeks or as needed.
Start including your walls every now and then in your vacuuming routine. This will help keep dust from accumulating and making the walls look drab.
For spots, wipe clean with a damp cloth. For tougher areas, try a thick paste of baking soda and water. If all else fails, consider a Magic Eraser.

Floors
A clean floor begins with regular vacuuming. But food stains and scuff marks need a little more attention.
How often: Daily, once a week or as needed.
Laminate floors need a barely dampened mop and small amount of gentle cleanser. For tough spots, you’ll want to get on your hands and knees and work on the spot with a scrubber. The same goes for tile floors, but grout lines will give you more trouble. Try this grout-cleaning solution as needed.
Hardwood floors are a different beast and will depend on the kind of finish that’s on your wood: polyurethane, shellac, wax or varnish. Follow the link below for tips on determining what finish you have.
Reducing dirt by not wearing shoes inside your house is the first line of defense. Next, vacuuming, sweeping and dust mopping with a solution of dishwashing soap and water will take care of the rest.
See more on cleaning your hardwood floors
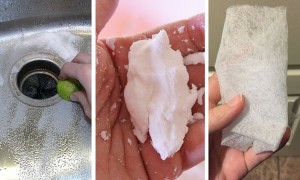
Garbage Disposal
No matter how clean your kitchen looks, if it smells off, it will feel dirty. Garbage disposals are a common odor culprit.
How often: Let your nose guide you, or every few days.
There are several methods for ridding your sink of stink. Create a pasty liquid with lemon juice and baking soda and pour the fizzing mixture into the disposal. Let it sit for a few minutes. Run cold water and turn on the disposal for one minute.
You can also sprinkle baking soda down the drain, then pour in vinegar and let it sit for about five minutes. Run hot water for 30 seconds and repeat as needed.
Or try cutting up a lemon and placing a slice into each slot of an empty ice cube tray. Fill the tray with vinegar and freeze. Toss a handful of the cubes into the disposal every few days and run it with cold water until they’re crushed.
See more on cleaning the garbage disposal

Windows
What good is a view if it’s blurred by smudges and dirt? Don’t leave out windows in your cleaning routine.
How often: Up to you, but two to three times a year is recommended.
Before you begin, make sure you protect your floors, walls and countertops from any drips of cleaning solution you’ll be using.
A solution of warm water and mild dish soap is a safe bet. Use a sponge to scrub down the windows, getting into the creases and corners. Then use a squeegee and wipe dry with a clean towel.
And don’t forget to clean the window screens.
See more on cleaning your windows

Pots and Pans
A dirty pan will make even the most spotless kitchen feel like a mess.
How often: After each use.
Washing by hand with dish soap and warm water after each use is the best way to go, but you’ll want to employ different methods for different materials.
See more on cleaning your pots and pans

Fruit Flies
Finally, what good is a clean kitchen if you’ve got fruit flies buzzing around?
How often: As needed.
Fruit flies have to enter your home, so start by making sure your windows and doors are sealed properly. Next, make a trap by pouring some vinegar or red wine into a dish and cover it with plastic wrap. Then poke a few holes through the top and leave the trap out on the counter to attract the flies. The flies will enter and drown or get stuck and die.
As a preventative measure, consider mesh covers or glass containers for your fruit.
See more on getting rid of fruit flies
More
Browse guides for organizing your kitchen
Get more housekeeping tips
Related Reads
Invest in a New Range Hood
Pick a Pantry
Dishwasher vs. Hand-Washing Debate Finally Solved


Great hints. Thank you. Dolores