Houzz Contributor, Lyndsye Felsman
I’ve encouraged clients and friends to step out of the box of traditional kitchen cabinets and try something different. I’ve offered suggestions such as bold cabinet colors, contrasting shades and a minimalist option: open shelving. It was time to put my money where my mouth was and mix it up in my own kitchen.
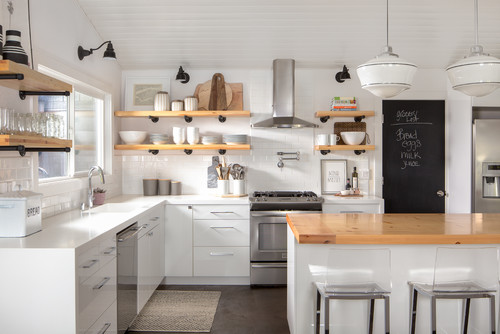
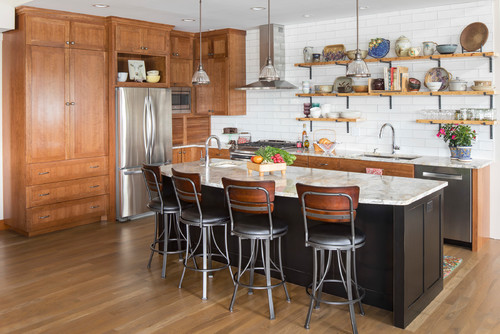
Note: These photos are examples of different styles of cabinets. See the writer’s actual kitchen at the end.
Why I Was Drawn to 2 Styles
Stepping out of your comfort zone can be hard, but I had decided that during this remodel, I’d be open to a new look for me and my family.
During the planning stage, I realized that installing two styles of cabinetry would work in my kitchen, so I kept an open mind to the idea, and especially to open shelves.
I liked the fact that open shelves could add depth to my kitchen and provide a display space for my pretty dishes that I love so much. It brings me joy to stage items around the home, so while I realize that open shelves aren’t for everyone, I knew that I would enjoy them. I’m a designer and home stager, so I enjoy rearranging things, including those pretty dishes. Plus, I could also store other everyday items in a handy place for my busy family.
Budget Matters
To keep costs low, my husband (a builder) and I did the cabinet work ourselves, from installing the open shelves to painting the existing cabinets. It’s definitely something you can learn to do if you have the time and patience.
Open shelves: We built and installed our own open shelves, as I mentioned. This was cost-effective because the bill included only the cost of the wood, stain and urethane finish. If the DIY approach isn’t for you, find a cabinet professional in your area who can help you with shelves or any other type of kitchen cabinetry project.
Brackets versus floating: We built shelves that slid over brackets on the wall to make the shelves look as if they were floating. Since we were going to tile the whole wall behind the brackets, we could bury the brackets under the tiles to give the shelves a floating look. Whether you have brackets that are visible or floating, make sure you affix the shelves directly to the studs in the walls to handle the heavy load of dishes.
Material: Make sure you choose substantial, sturdy brackets, not tiny or plastic ones, because you want them to be able to hold the weight of the shelf and anything you put on it.
Total cost: $200
Paint, not replace: For us, it made sense to paint, and not completely replace, the rest of our cabinets. It was much cheaper than all-new cabinets and took less time.
Total cost: $125. Replacing the cabinets would’ve cost at least $5,000.
How we refinished the cabinets:
Remove doors and hardware. Be sure to number and label both the doors and the hardware as you remove them or you’ll regret it later. We also found it helpful to put the hardware for each door in a plastic bag and then store that bag inside the cabinet. This made it easy to reinstall the hardware.
Clean the existing cabinets. You want to use something like a trisodium phosphate (TSP) degreaser. You may have to go over the doors a few times to remove all the grime. Don’t skip this step! It’s necessary to get a good finish in the end.
Fill any scrapes or dings with wood putty. This will give you a smooth finish and make old cabinets look new again.
Sand the cabinets. You want to sand just enough to rough up the surface so that the new finish will adhere better. You don’t need to sand the cabinets completely down unless there are areas that are flaking or chipping. We used 100-grit sandpaper — that should do the trick.
Vacuum the cabinet surfaces. Vacuuming will remove any dirt or dust from sanding.
Prime the cabinets. You’ll want to use a good stain-blocking primer, such as Zinsser’s B-I-N or a Kilz product, to ensure a smooth painting process.
Do a quick sanding, if needed. This step will remove any brushstrokes left behind after the priming. Use a 220-grit sandpaper and wipe off any resulting dust.
Paint your first coat. The key is to use a light coat so that you don’t layer on too much paint. You can roll or brush paint on the cabinets, but if you can, spray-paint for a better finish.
Sand with 220-grit paper. Don’t forget to wipe off and vacuum dust after each sanding.
Paint your second coat.
Sand again. Remember to wipe or vacuum away dust.
Apply a clear coat or acrylic finish, if desired. This provides extra protection to the surfaces.
Reinstall doors and hardware. Because you labeled the doors and organized the hardware, this process should be straightforward.
Pro tips: Put a couple of coats of protective urethane on your shelves. This won’t affect the style, but it will make them easier to clean and keep your dishes from scratching the surface. If you are going to put on new cabinet hardware, buy it in bulk if you can. Many times, the more you buy, the more you save.
Style Selection
Open shelving has always been a favorite style of mine because I love displaying the vintage and custom dishes I’ve collected over the years. Although I didn’t install it exclusively in my kitchen, I took this remodel as an opportunity to add the open shelves I’d always wanted.
Two styles: Choosing two styles can seem daunting to some, but mixing styles, like mixing patterns, can bring so much personality to a space. I landed on keeping the lower cabinets and the upper cabinets above the stove, and then installing three open shelves above my largest expanse of countertop. This seemed like the best place for them because having them around my stovetop would cause more mess than I wanted to deal with.
Storage concerns: Surprisingly enough, it’s amazing how much you can fit on the shelves. You just have to be disciplined about keeping them tidy and clean, and set them up to suit your family. In the end, open shelves gave me a little more storage space because I didn’t have any vertical dividers. Of course, I didn’t want everything in my kitchen on display, so I kept some of my upper cabinets and all the lower ones.
Family Needs
We have three boys and all the friends and visitors we can welcome, so I wanted my kitchen cabinets to first off be functional.
Pros of two styles: Open shelves make everyday items accessible. People don’t need to ask where to find a coffee mug — they can just snag one from the shelf. Plus, unloading the dishwasher is a breeze. The most common things go right back up on the shelves. At the same time, the closed cabinets hide our less attractive kitchen items.
Cons: The items I don’t use all the time can accumulate dust, but I’ve just added them to my dusting routine. The additional 30 seconds of cleaning is worth the display space for me.
Before Photo
See My Kitchen Cabinet Transformation
Before: My upper and lower cabinets were maple with peeling hardware. They made me feel a little claustrophobic in the space and were suffocating when I was at my sink.
After: The floating shelves and fresh paint on the lower cabinets make my kitchen feel brighter and bigger. We were able to transform our cabinets for $325 and a little elbow grease. That price tag included the open-shelving materials, cabinet paint and new cabinet hardware.
My open shelves are everything I thought they would be and more. Our everyday items are easy to reach, and I love styling the shelves and changing out seasonal decor.
For the floating shelves, we used sanded plywood with a pine edge and installed them on floating brackets. They opened up the space, making it feel much larger than it is.
Across from the shelves, we have our original cabinets, just painted in new shades. For the top, we used Alabaster from Sherwin-Williams. On the bottom, I went with Still Water by Sherwin-Williams. I chose the color because I loved the bright feel, and now that it’s in the space, I love it! It’s so daring and feels so right.
This mix of styles and colors pushed me out of my comfort zone, but I’m so glad I followed my designer-self’s advice and did it. There’s no need to be scared of mixing two colors or styles, especially if one is a neutral. I absolutely love how these cabinet choices really made our kitchen feel like our own.
Do you have a mix of cabinets in your kitchen? How did you decide on your cabinets? Tell us in the comments section.
Related Links:


