If I was a construction worker, I would most certainly be unemployed. Why you ask? Well I happen to be horrible at just about all things that involve a drill or screwdriver. Up until now I’ve been stealthy in my ability to steer clear of highlighting this handicap of mine, that is until I became a homeowner on September 17th.
I’ve begrudgingly come to realize that I don’t have a “landlord” to call anymore when things go wrong in my house. The buck stops with me and I’d be looking for part-time jobs if I spent money every week on getting contractors into my home to do small cosmetic fixes that I could easily do myself.
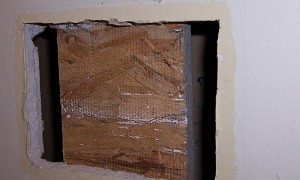
Last weekend it took my brother and I about 5 hours (no joke) to remove an air conditioner from my lower level window that was left by the previous homeowners. In my rush to get the unit out of the window I accidentally left a pretty sizable hole in the drywall surrounding the window.
Seeing how the hole isn’t gaping, I’m determined to get my Bob Villa on and spackle it myself and repaint it once it dries up. YouTube is a great resource for tutorials of all kinds, so I’m leaning this “Home Repair & Remodeling : How to Repair Minor Drywall Damage” video to guide me.
Here are a few highlights from the video:
Materials you might need
– Tube of white toothpaste
– Lightweight spackle or non-shrink drywall joint compound
– Wide putty knife
– Thin sanding block
1.) If you’re fixing small holes like the kind you get from hanging a photo up, you could use white toothpaste to fill in that hole prior to repainting. Once it dries up it usually gives you a good surface to paint over.
2.) If you’re afraid of using toothpaste, or if the hole is a bit bigger, your best bet would be to use a lightweight spackling compound that you can get from any hardware store. Simply take a scoop of the spackle with your putty knife and press it into the area.
3.) To avoid having to sand, be sure to smooth the hole over by scraping across it in opposite directions after you fill it in with the compound.
4.) Let the spackle dry for about half an hour.
5.) If the spackle dried a little unevenly, you can use a 220 or 300 grit fine sandpaper to sand over the area to make it smooth and suitable for painting.
6.) The hole should be smooth and ready for you to paint over it. If the hole is rather large, you might have to use some primer prior to using your matching paint.
The video demystifies spackling rather well, and I’m looking forward to trying this out this weekend. If you’d like to see some pictures on how to spackle small holes, visit Houzz for another great tutorial on how to get the job done! Wish me luck.


[…] post Tool Time: How to Spackle Small Holes in Your Drywall appeared first on <a class="colorbox" …read […]